
For our community who have been with us for sometime you probably realized that we’ve reworked the van. By reworked I mean to say stripped it down to the sheet metal and done a complete rebuild. I’ll leave the old build info below incase it’s still helping
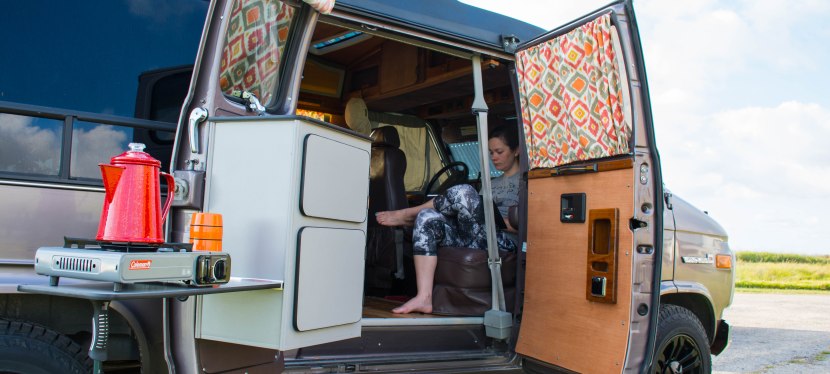
What follows is the our DIY campervan lovingly named Dolores. A beefed up, solar, efficient tiny home on wheels. There is a comment box at the bottom if you have a question, just ask I will attempt to help if I can.
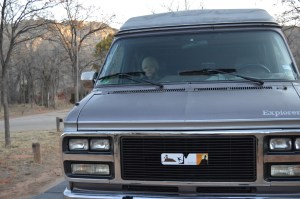
After many miles driven to look at vans listed on Craig’s List, we met a kind couple in Spring Texas and for 2000 dollars drove a 1994 GMC conversion van home.


I chose a conversion van for the items which were already installed. The high top roof for example is quite expensive and labor intensive to install. However, on this older van it has little to no influence on the final resale value. Basically there are parts you would not get if you bought a cargo van, which in a conversion van are free; such as the captain chairs, electric bed 12 volt television etc…
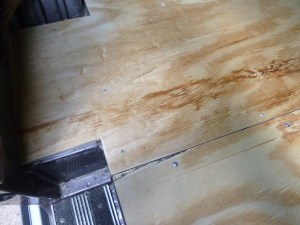


I removed the interior from the front seats back, cut out the old shag carpet and kept every screw, bolt, and panel many of these parts can be reused or re-purposed. After installing half inch plywood to the floor, using a countersink bit and stainless sheet metal screws, I then sprayed the undercarriage with undercoat to prevent rusting. The plywood was then overlaid with thick vinyl snap together flooring from Lowes.

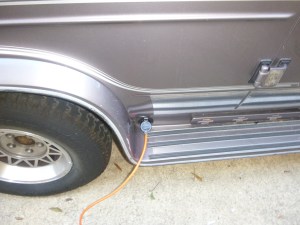
The flooring was trimmed with aluminum threshold molding secured with stainless screws attached to the plywood sub-floor.
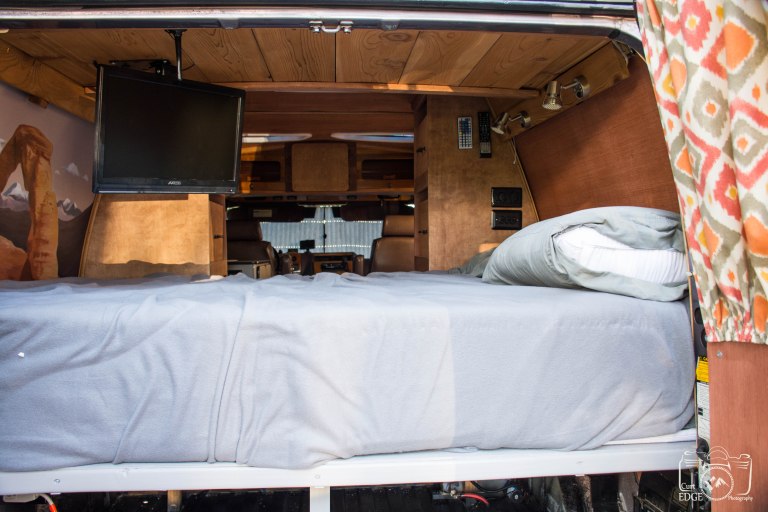
Our last build relied on a rock and roll bed. A metal frame folding bed which by means of electric motors returned to the only living space seating in the van. We grew tired of putting the bed up and down every morning and night. The metal frame squeaked when we rolled over at night. As such this time I build a permanent bed frame. Thanks to a 10″ memory foam mattress we now sleep like the dead!
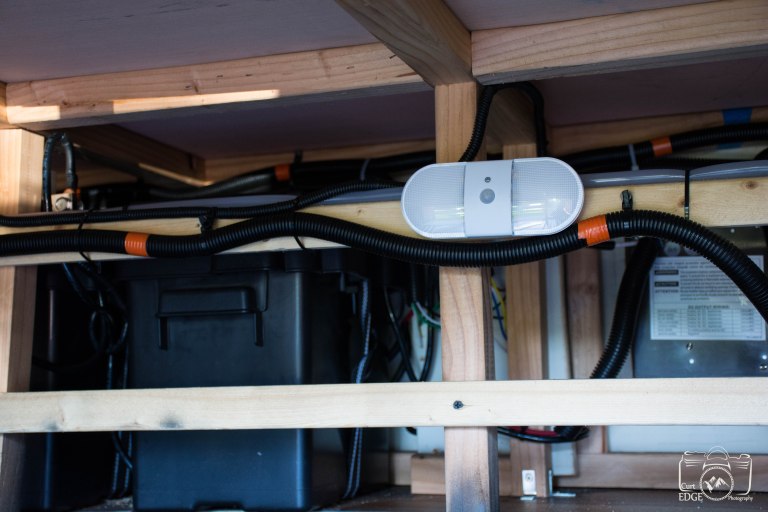
Below the bed is a dedicated area for the batteries, shore power charge-controller, water tank, and lots of storage. We’re able to fit an easy up, three large storage containers, a small cooler, and container of chords, hoses etc…, our chairs, and a small propane grill. (note: the orange tape on the wiring loom dictates 120volt wiring)

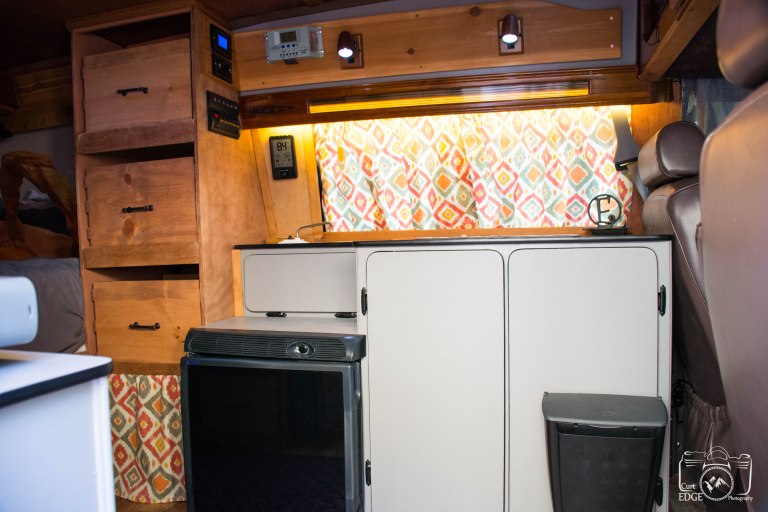
As mentioned above this is our (Shore Power) charge controller. When plugged into power at a park, our home, or generator this device charges our batteries, and acts as our 120 volt breaker box.

All 12 volt devices such as our refrigerator, lighting, fans, fantastic fan, and charging ports are individually fused. The main power cable for the batteries is fused both in the battery boxes, and just before it enters the distribution block. An electrical disconnect switch, the green handle above the block, can be turned to cut power in case of an emergency.
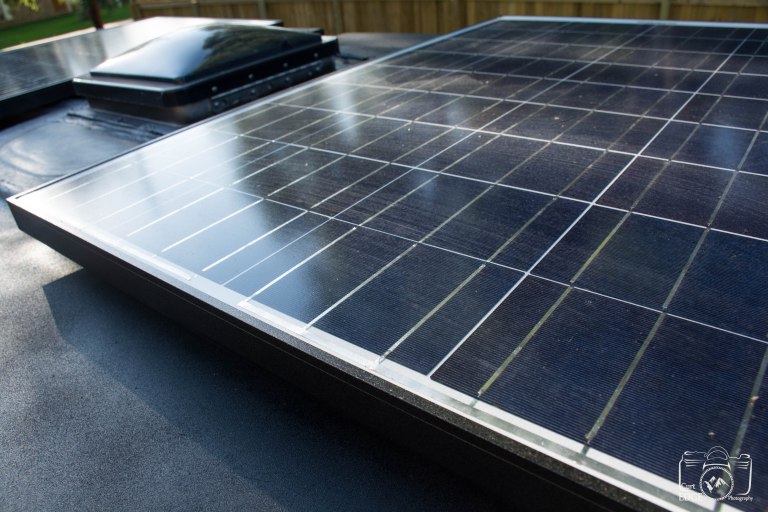
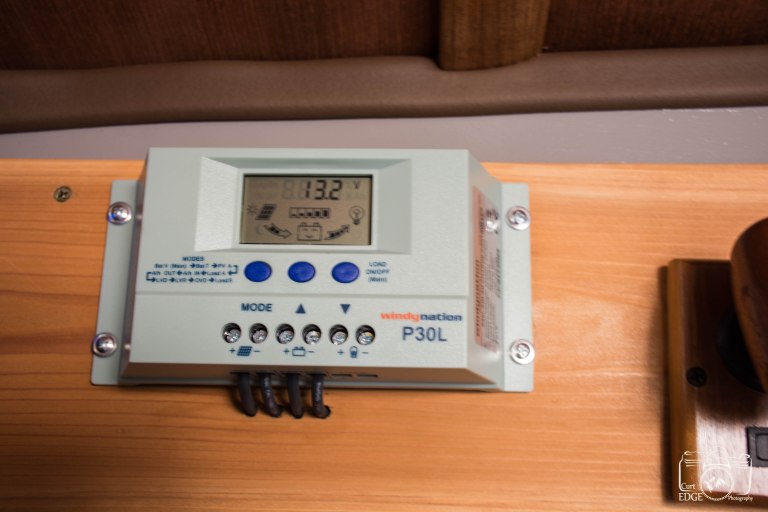 300 Watts worth of solar panels along with 215 amp hours worth of batteries take care of our electrical needs. Aside from air conditioning everything can run off of solar, including the refrigerator which only pulls 3.7 Amps DC. I love seeing a happy battery on the solar charge-controller.

Our phones, Kindles, laptops, and other devices charge by means of USB ports all of which convert 12volt to the required voltage and amperage for each device. LED strip lights secured behind the valances about the bed and living spaces. LED reading lamps are positioned by the bed and cabinets. LED’s put off lots of light yet use very little power. With every light on we are only using .6 Amps DC.
The picture above also shows where we keep our clothes. 6 removable wooden bins serve as our wardrobe. Offering the volume necessary to pack two weeks worth of clothing.
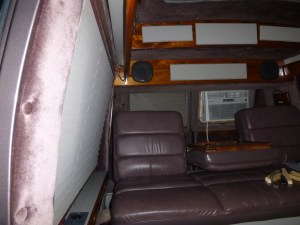
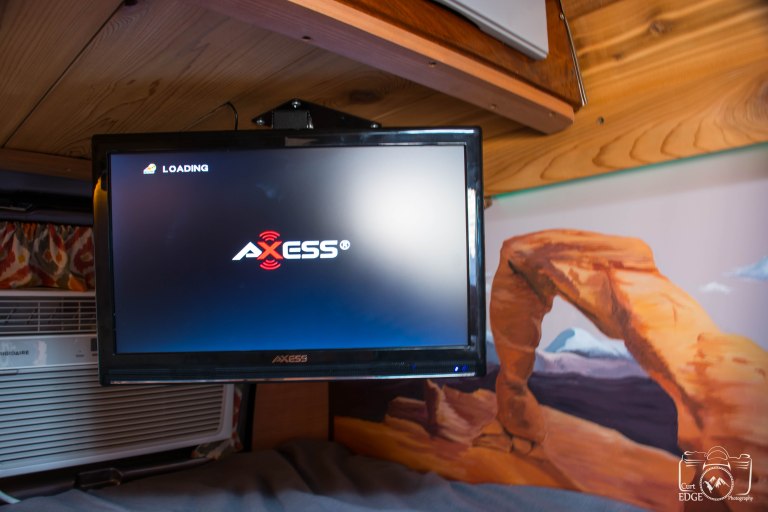 A 12volt smart TV with DVD provides entertainment when it’s raining. In reality we hardly ever use the television. Lauren’s an art teacher, who did the painting of Delicate Arch you see on the side wall, aka the foot board of our bed.

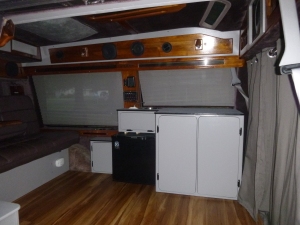
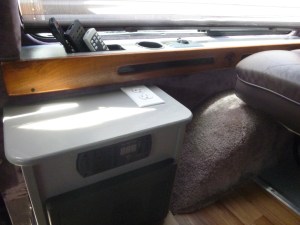
A tiny sink and curtains bring in a since of home. The weather station on the wall doubles as a monitoring station for the performance of our refrigerator. I simply put the remote sensor in the bottom of the fridge.
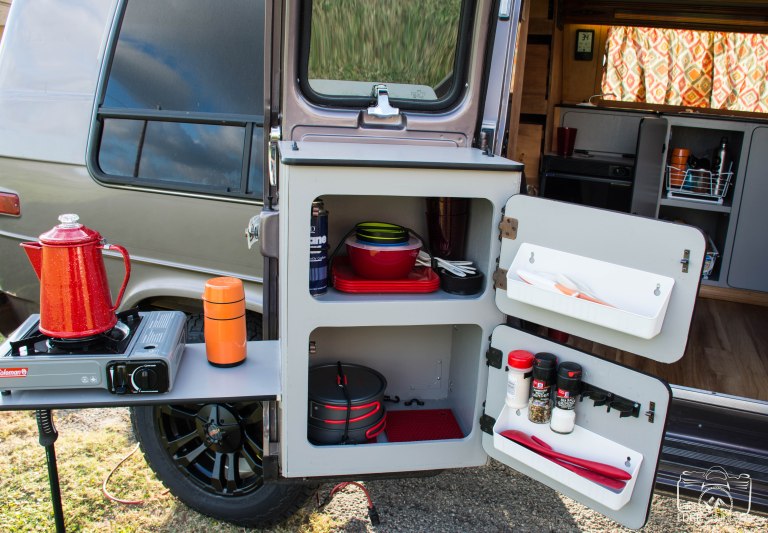
Lots of cabinet space is a must for long trips. But with bad road conditions stuff gets tossed about. Everything has a place and is secured with shock chord. I used a kit from Amazon designed for kayak deck rigging. The small table to the side removes and snaps to the other side of the cabinet. An old track pole and a few modified snaps made for a solid adjustable support leg. 
Small touches make a small space feel like home. A very good friend and neighbor of ours made this for us.
I’ll add more as time allows. Such as the generator box, basket wrack, AC cover, swivel seat base, curtain hardware, how too, etc…
Old build

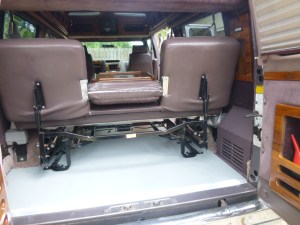

Behind the seat/bed is our gear storage. To keep stuff from sliding around the plywood was painted with a heavy textured deck paint, and then trimmed in the same fashion as the front flooring.


Over the long life of this poor van a few water leaks had damaged many of the fiberboard panels. We live near the coast and planned to use this van to camp on the beach. This influenced the use of hardwoods, and marine grade electronics. Every fiberboard panel was rebuilt from hardwood and painted in an attempt to turn down the purple Joker interior.


With the floor and ceiling completed it was time to take on electrical. Understand that this unit was never intended to be more than 5-7 days off grid. As such there are 2 electrical systems a 120v AC system, and a 12 volt DC system. An RV charge controller is like a homes 120 volt breaker box , a cars 12 volt smart battery charger, and a fuse block to protect the circuits you install. The inverter turns 12 volt DC power into 120 volt AC pure sign wave which enables us to run 120 volt devises such as our refrigerator or computers when we are not plugged into shore power. I will be adding solar panels this summer to extend our off grid window.


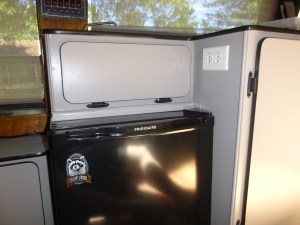


The building of custom cabinets and instillation of the refrigerator, sink, speakers, portable toilet, and air conditioner/ heater brought the comfort level up to class b motor home standards. It was important for this application to keep as many components using 12 volt as possible, while keeping power usage low. Every bulb is LED, including the strip lights behind the cabinet valances. When we are plugged into shore power the 12 volt components run off of the charge controller as it charges the batteries. When off grid the 12 volt components draw power from the batteries.


It was now time for those personal touches, the silly stuff makes it fun. After all when you sleep in a van next to a 1million dollar RV don’t you want them to feel secure in their assessment of your abnormality? Our final build with cost of van came out to around 4,800 dollars. This included all mechanical repairs, keeping in mind I did all the work. The entire system including the air conditioner, charging, lights, television, and water pump easily runs off of a Honda 2000i. Under this load the generator only consumes 1 gallon of fuel every 6-7 hours Currently working on cosmetics we have removed the running boards, and will soon rework the AC unit, and paint the fiberglass high top. In short more to come.


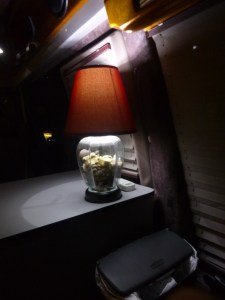
In the attempt of better lighting and to make our little van feel more like a home a solid mounted lamp seemed a good solution. A trip to the Goodwill yielded a less than beautiful lamp for “3 dollars” which when taken apart and the horrible floral insert removed became a solid project base. The metal parts were sanded and painted with a black low gloss spray paint. All the electrical parts were reused. An burnt out florescent bub base “free” was removed carefully from the old bulb. Inside this base is two wires which where then soldered to the 3157 GM turn signal socket “2 dollars”, removed from a discarded headlamp junkyard harness. The socket was then super glued to the old florescent base and wrapped in some electrical tape. A 3157 LED turn-signal bulb from Walmart”10 dollars” was installed in the socket and the lamps 120volt plug removed then tying the wiring into the 12 volt power and ground source of my van with a fuse and a remotely mounted switch.
If you have questions, need help with your build, or just want to tell me how horrible my work is feel free to leave a comment. If you are planning on telling me my work is horrible and pointing out non-stop criticism with no positive input the send button for you comment can be found at the end of the toaster you should be currently taking a bath with.

You have a lot of fantastic skills that must have helped a lot while improving your van home! (The van looks great, btw.)
I don’t think I recognize you as being at the Rubber Tramp Rendezvous this year. Have you/your wife been in the past?
LikeLiked by 1 person
We have not attended the Rubber Tramp Rendezvous before. It was only during my research in preparation to build our campervan that I became aware of the RV and Vandwelling movement. It was this group of people who became the most helpful and supportive avenue of information. Thank you so much for your kind support.
LikeLike
Very cool and impressive!
LikeLiked by 1 person
Fantastic home on wheels that you have built. Reminds me of a camper we built on a half ton and lived in for a year while travelling through Mexico. Used galley cupboards and sink from a boat for the kitchen area. Nice explicit instructions.
LikeLiked by 1 person
What a treasure! You are a genius.
LikeLiked by 1 person
You did a great job showing how you did this. Not sure I have the skills to DIMS. Thats for the inspiration though.
LikeLiked by 1 person
It starts with little projects one thing at a time. Practice on scrap materials, each skill builds on the next until one day you look up and realize you are almost finished. Thanks for stopping by.
LikeLiked by 1 person
Impressive but seems a bit complicated to me. Nice job!
LikeLiked by 1 person
How cool!! DIY is definitely the way to go. Great post!
LikeLiked by 1 person
My hat off to you for undertaking such a project. Major amount of work. I had a similar Ford Van that I drove for ten years. I sold it in the end with 240,000 miles on the clock. It was not a conversion but I really enjoyed it. Enjoy the one you have.
LikeLiked by 1 person
You have done a great job!
LikeLiked by 1 person
Thank you very much.. Still so much to do.
LikeLike
This is most definitely on my to do list! Awesome 🙂
LikeLiked by 1 person
Great DYI project! I’m fixing things in my new camper (which has turned into quite the headache). Its neat to see what other people have done with their mobile homes. You’ve done an amazing job!
LikeLike
Thank you and don’t assume it all went as planned. I didn’t include the mistakes of which there were many.
LikeLike
Nice work. Some good ideas I can use in my Travco restoration.
LikeLike
Just wanted to say hi and we done with your blog and camper. I shall look forward to following and thank you kindly for liking and stopping by my friend.
LikeLiked by 1 person
Brilliant, you’re a clever man!!. I love the idea of campervan life.
LikeLiked by 1 person
Oh woow, this is really cool post! We have bought and rebuilt our van back in NZ as well, but just basiclly, without any electric components or water sewage system. Next time though, we wanna do something more livable and comfortable so I am saving your post for future reference 🙂
LikeLiked by 1 person
So glad you enjoyed the post. Feel free to contact me if you have any questions. Best of luck.
LikeLike
Curt – What a Great and informative article. I can see it as a fantastic reference for others who want to be a DIY camper.
You obviously thought things out for a long time before you started because your process seems to be perfect, and without errors.
My old Bounder has a 5500 Onan generator, and it burns around 1/2 a gallon an hour at half load. I wish it was as efficient as yours. And your electrical planning turns your rig into a motorhome with the necessary luxuries we all want at times.
Great job explaining it all.
DON
LikeLiked by 1 person
Great job!
LikeLike
Thank you it has continued to be a learning experience. I truly enjoy your blog. Keep up the great work.
LikeLike
Thank you. Appreciated.
LikeLiked by 1 person
Thanks for the visit guys! Very much appreciated. Nice read in your intro too – sounds like you found your matches!!!
LikeLiked by 1 person
Super cool! My boyfriend and I are 1 year in to rebuilding a VW camper 🙂
LikeLike
That’s awesome. This van is currently being rebuilt. The new unit will be full solar, a full size bed, new paint job etc.. Would love to see some pictures of your build.
LikeLiked by 1 person
I will get some on my blog very soon!
LikeLiked by 1 person
Now, that’s living large!
LikeLiked by 1 person
can you teach me to camper van?
LikeLiked by 1 person
Yes I can! But first you have to take your wife camping!!!
LikeLike
Nice van but not so practical for us here in Europe on several fronts ;=) We are one of the many thousands of VW campervan ones in the UK an Europe https://vanblanc.blog/van-blanc/
I am curious how you get on the the bed across the back. Is the van very wide of are you both less that 6ft?
LikeLike
The bed is open from the living space in the front. I cut the body ribbing out of the side wall, welded in square tubing for support and reattached the sheet metal with body adhesive. This allows for a full size bed. Able to sleep someone up to 5` 11″ without touching their feet on the wall.
LikeLike
I guessed it was something like that. It certainly helps you with space utilisation. Would be fine for my wife but not me. Unfortunately a VW van is way short of that anyway. The best we would ever get if we did that is about 5ft.
LikeLike
In design every inch count. I struggled to make the best use of space, stay within weight, and be comfortable.
LikeLike